Your Free Introduction to Ultimate Lines Made Simple
Discover the systematic progression that teaches retrievers to trust the handler's line and carry it with confidence and conviction—even as factors become more influential.
Outcomes
By the end of the Ultimate Lines course, your retriever will:
- Trust the line selected by the handler
- Take a more precise initial line
- Take initial lines with greater confidence and conviction
- Carry the line farther despite increasing influences
- Require less handling on blinds
- Develop the foundation required for advanced blind work, including poison bird blinds
More Than Just Videos—Written Lesson Narratives
Every Ultimate Lines lesson includes a companion Lesson Narrative that can be printed and taken to the field.
Each narrative summarizes the training objectives, field setup, progression goals, and key teaching concepts—giving you a written reference whenever you train.
Download the complete Phase 3 Step 5 Lesson Narrative and see how Ultimate Lines combines video instruction with step-by-step written guidance.
Download a Sample Lesson Narrative
Why Initial Lines Matter
Great blinds begin with great initial lines.
When a retriever leaves your side, every yard off line increases the likelihood of additional handling. The quality of a blind often begins with the quality of the initial line.
Ultimate Lines addresses that problem by teaching the dog to take and sustain the line provided by the handler—even in the presence of competing factors that would otherwise pull the dog off course.
How Ultimate Lines Works: A Step-by-Step Progression
Ultimate Lines is organized into three phases and 14 progressive steps. Early steps use visible pile markers to help the dog understand that following the handler's direction leads to success.
As the progression advances, visual markers are reduced while competing factors become more influential. The dog learns to trust the handler, take the intended line, and remain committed to it despite increasing suction.
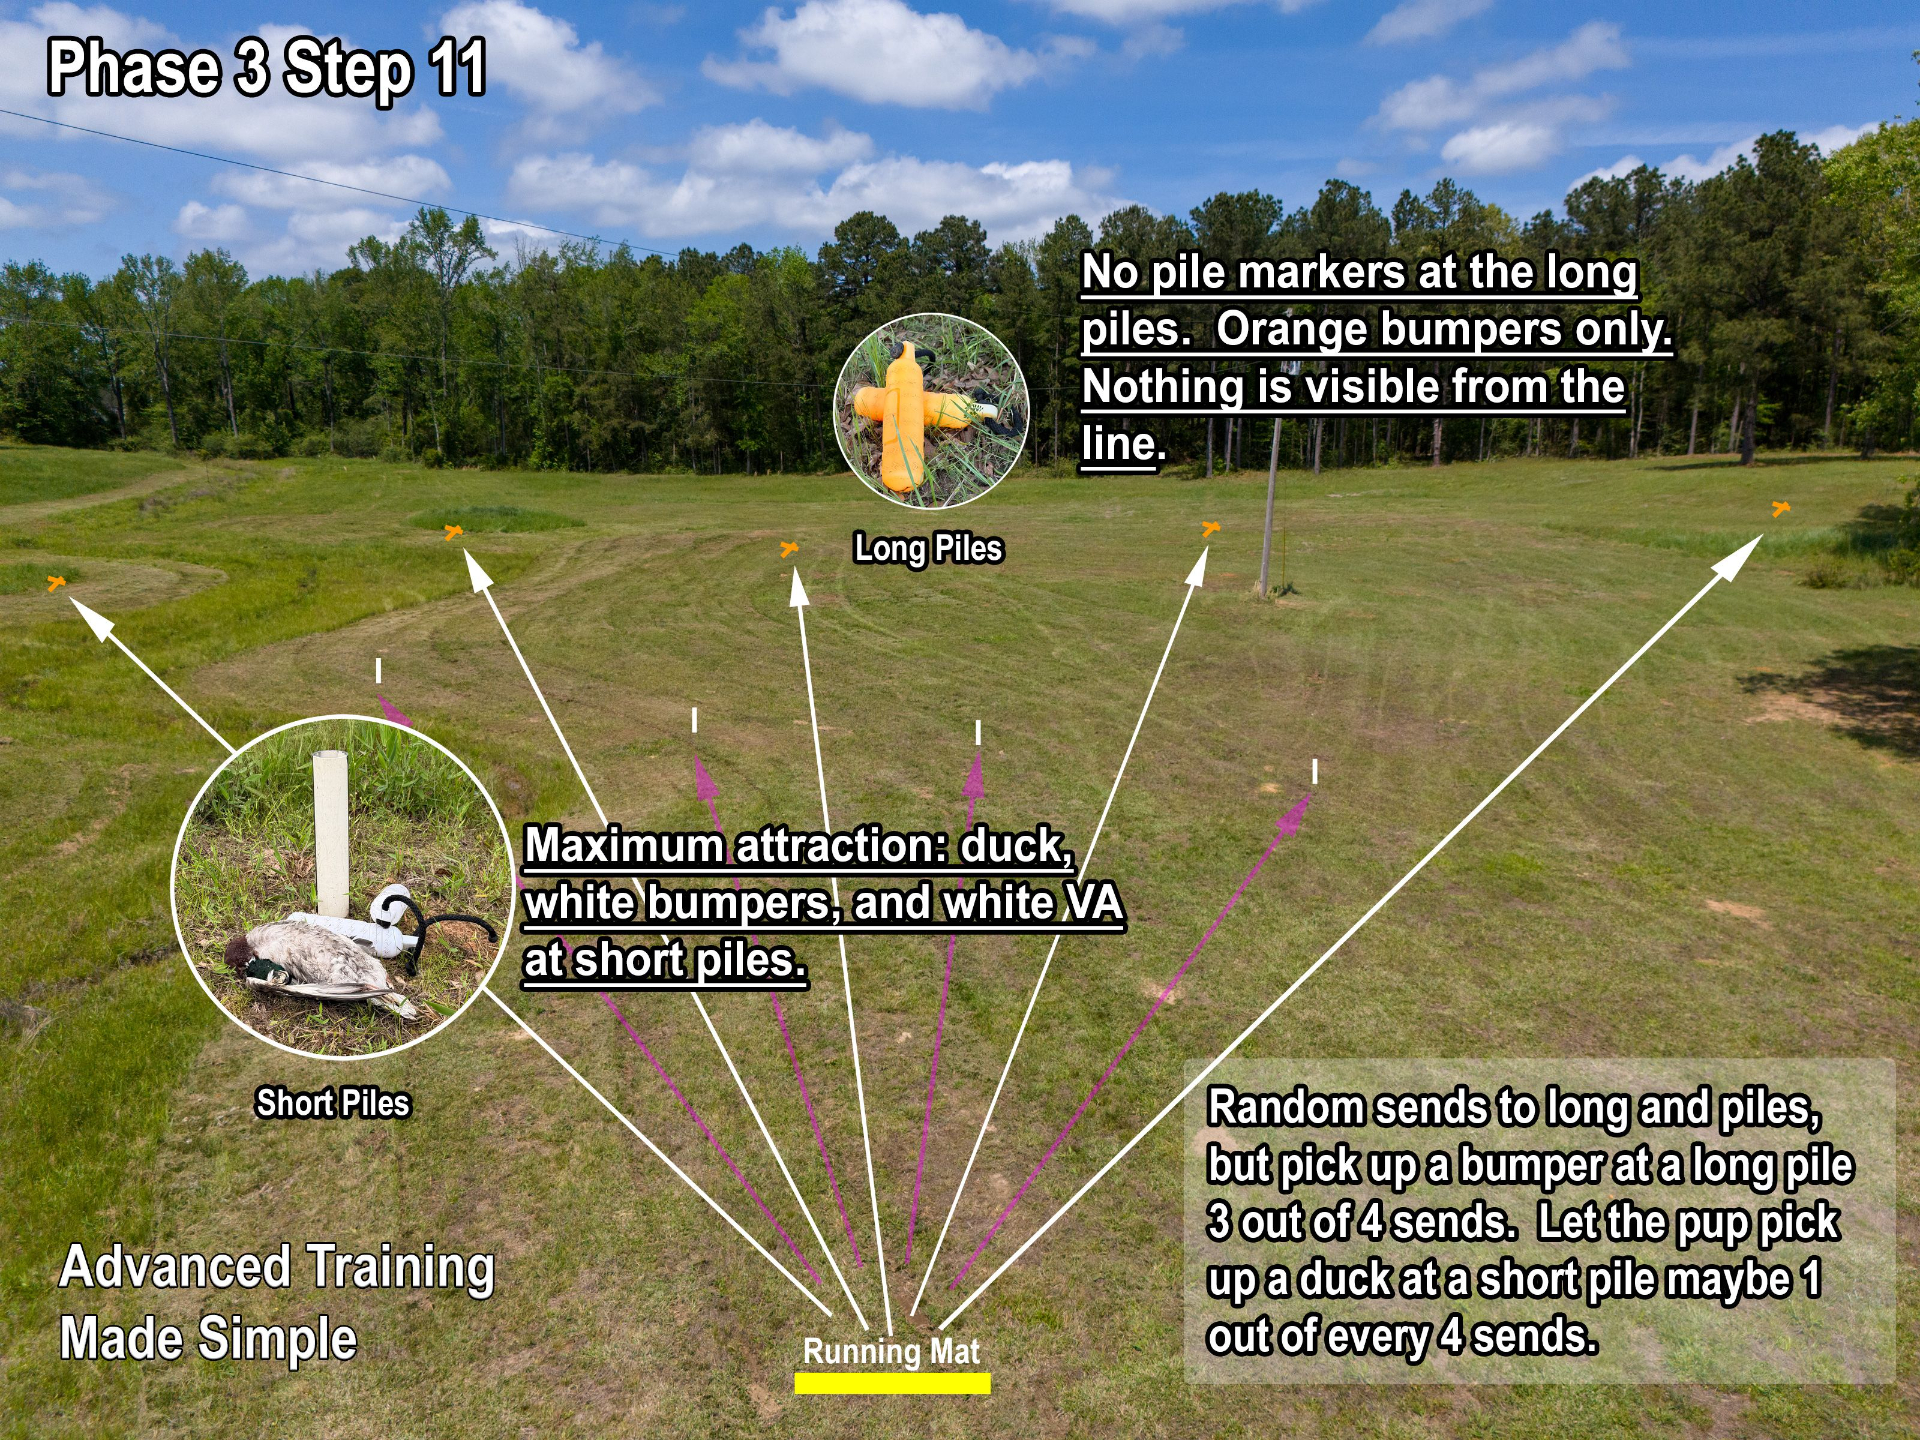
Example Ultimate Lines Field Diagram
This Phase 3 Step 11 field diagram shows how the setup and key elements of each step are presented.